
Web Server (IIS) Installation for IPSX Dashboard on Windows Vista
Home |
Prerequisites |
Installation |
IPSX Configuration Wizard |
Optional IIS Configuration
|
|
Web Server (IIS) Installation for IPSX Dashboard on Windows Vista |
The IPSentry IPSX Dashboard may be hosted under Internet Information Services (IIS) for content delivery.
The following document requires the following actions have already been completed as well as a basic knowledge of IIS configuration under Windows Vista.
Step 1 - Create an application pool and virtual directory for accessing IPSX Dashboard - Optional
While it is not necessary to create an application pool and virtual directory, it is recommended in order to avoid conflicts with existing sites using .NET frameworks other than .NET 4.
Application Pool Configuration
In the IIS manager snap-in, select the Application Pools node, right click and select Add Application Pool.
In the Name field, enter IPSentryIPSXAppPool or another identifying name of your choice.
In the .NET Framework version, select .NET Framework v4.0.30319
Click "OK"
Now, in the Application Pools list, highlight the application pool you just created, right click, and select Advanced Settings
Under the Process Model group, locate the "Identity" setting and set this to "NetworkService"
Click "OK"
Add the IPSX Dashboard as a new Application
In the IIS Manager snap-in, select the Default Web Site node, right click and select Add Application
Enter "IPSentryIPSX" or other name by which you want
to reference the virtual directory in the Alias field. This will be added
to your default URL path in order to access the IPSX web site.
For example,
you will end up pointing your browser to
http://127.0.0.1/IPSentryIPSX/
Click on the "Select" button in order to select the application pool that you created in the previous step.
In the Physical path field, select the webroot
folder in the directory where you originally installed IPSentry
IPSX.
If you used the default installation path, this should be
c:\IPSentryIPSXDashboard\webroot .
If you installed IPSX to a different location, enter that location in
the Directory field or click Browse to locate the folder.
Click "OK"
Step 2 - Configuring ASP.NET on IIS for .NET Framework 4
The following actions need only be performed once in order to register
ASP.NET 4.0 with IIS
Step 3 - Configuring access rights to the IPSentry application folder
You should now be able to access the dashboard at
http://127.0.0.1/IPSentryIPSX/
The URL above may be different depending on the configuration of your
default web site, accepted host headers, and other IIS configurations that
have been modified from the default installation.
The IPSentry IPSX Dashboard utilizes Internet Information Services (IIS) and ASP.NET for content delivery and must be enabled on the system running IPSentry.
The following outlines the basic installation steps for configuring IIS on a system where IIS has not been enabled. If you are already running IIS on the system on which IPSentry is installed, you may use this document as a reference to the minimum features required to deploy IPSX Dashboard.
Once IIS has been installed, please see Installing IPSentry IPSX Dashboard for installation options.
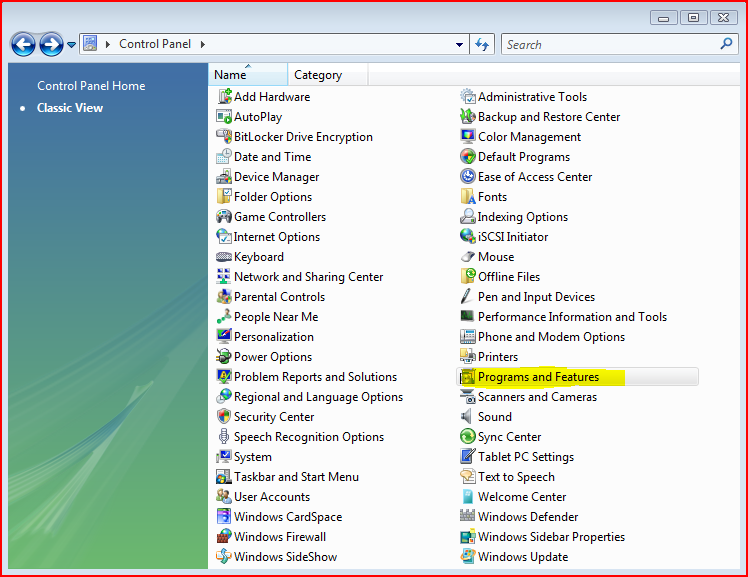
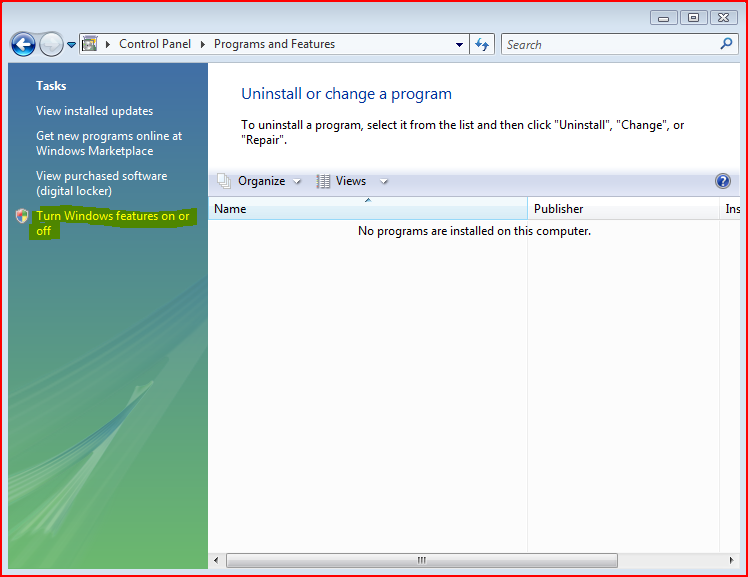
Visual Walk
Through
The following displays the various dialogues for each of the above
steps during the IIS Install process.
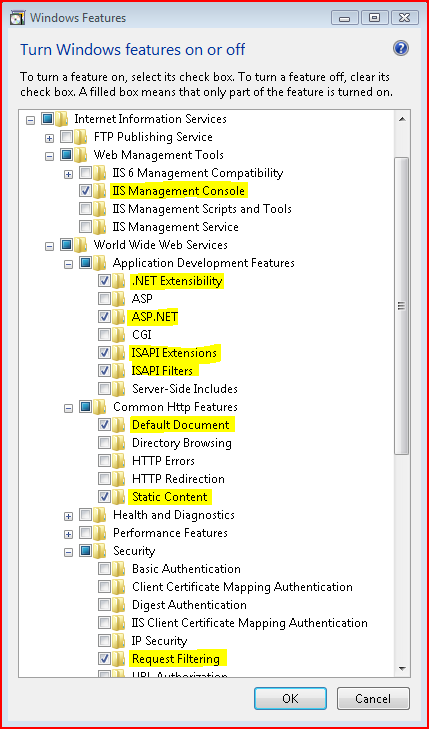
If you already have IIS Installed, then you need only insure that the features
and services shown in step 4 are enabled as these are the minimum required
features for IPSX Dashboard.
Copyright ©1997-2011 RGE, Inc. - All Rights Reserved
IPSentry® is a Registered Trademark of RGE, Inc.